Gates (beta)
Quickstart
Gates provide rule-based protection for any user action in your application. Think of them as intelligent checkpoints that automatically decide whether to allow, block, or challenge user requests based on email and domain intelligence.
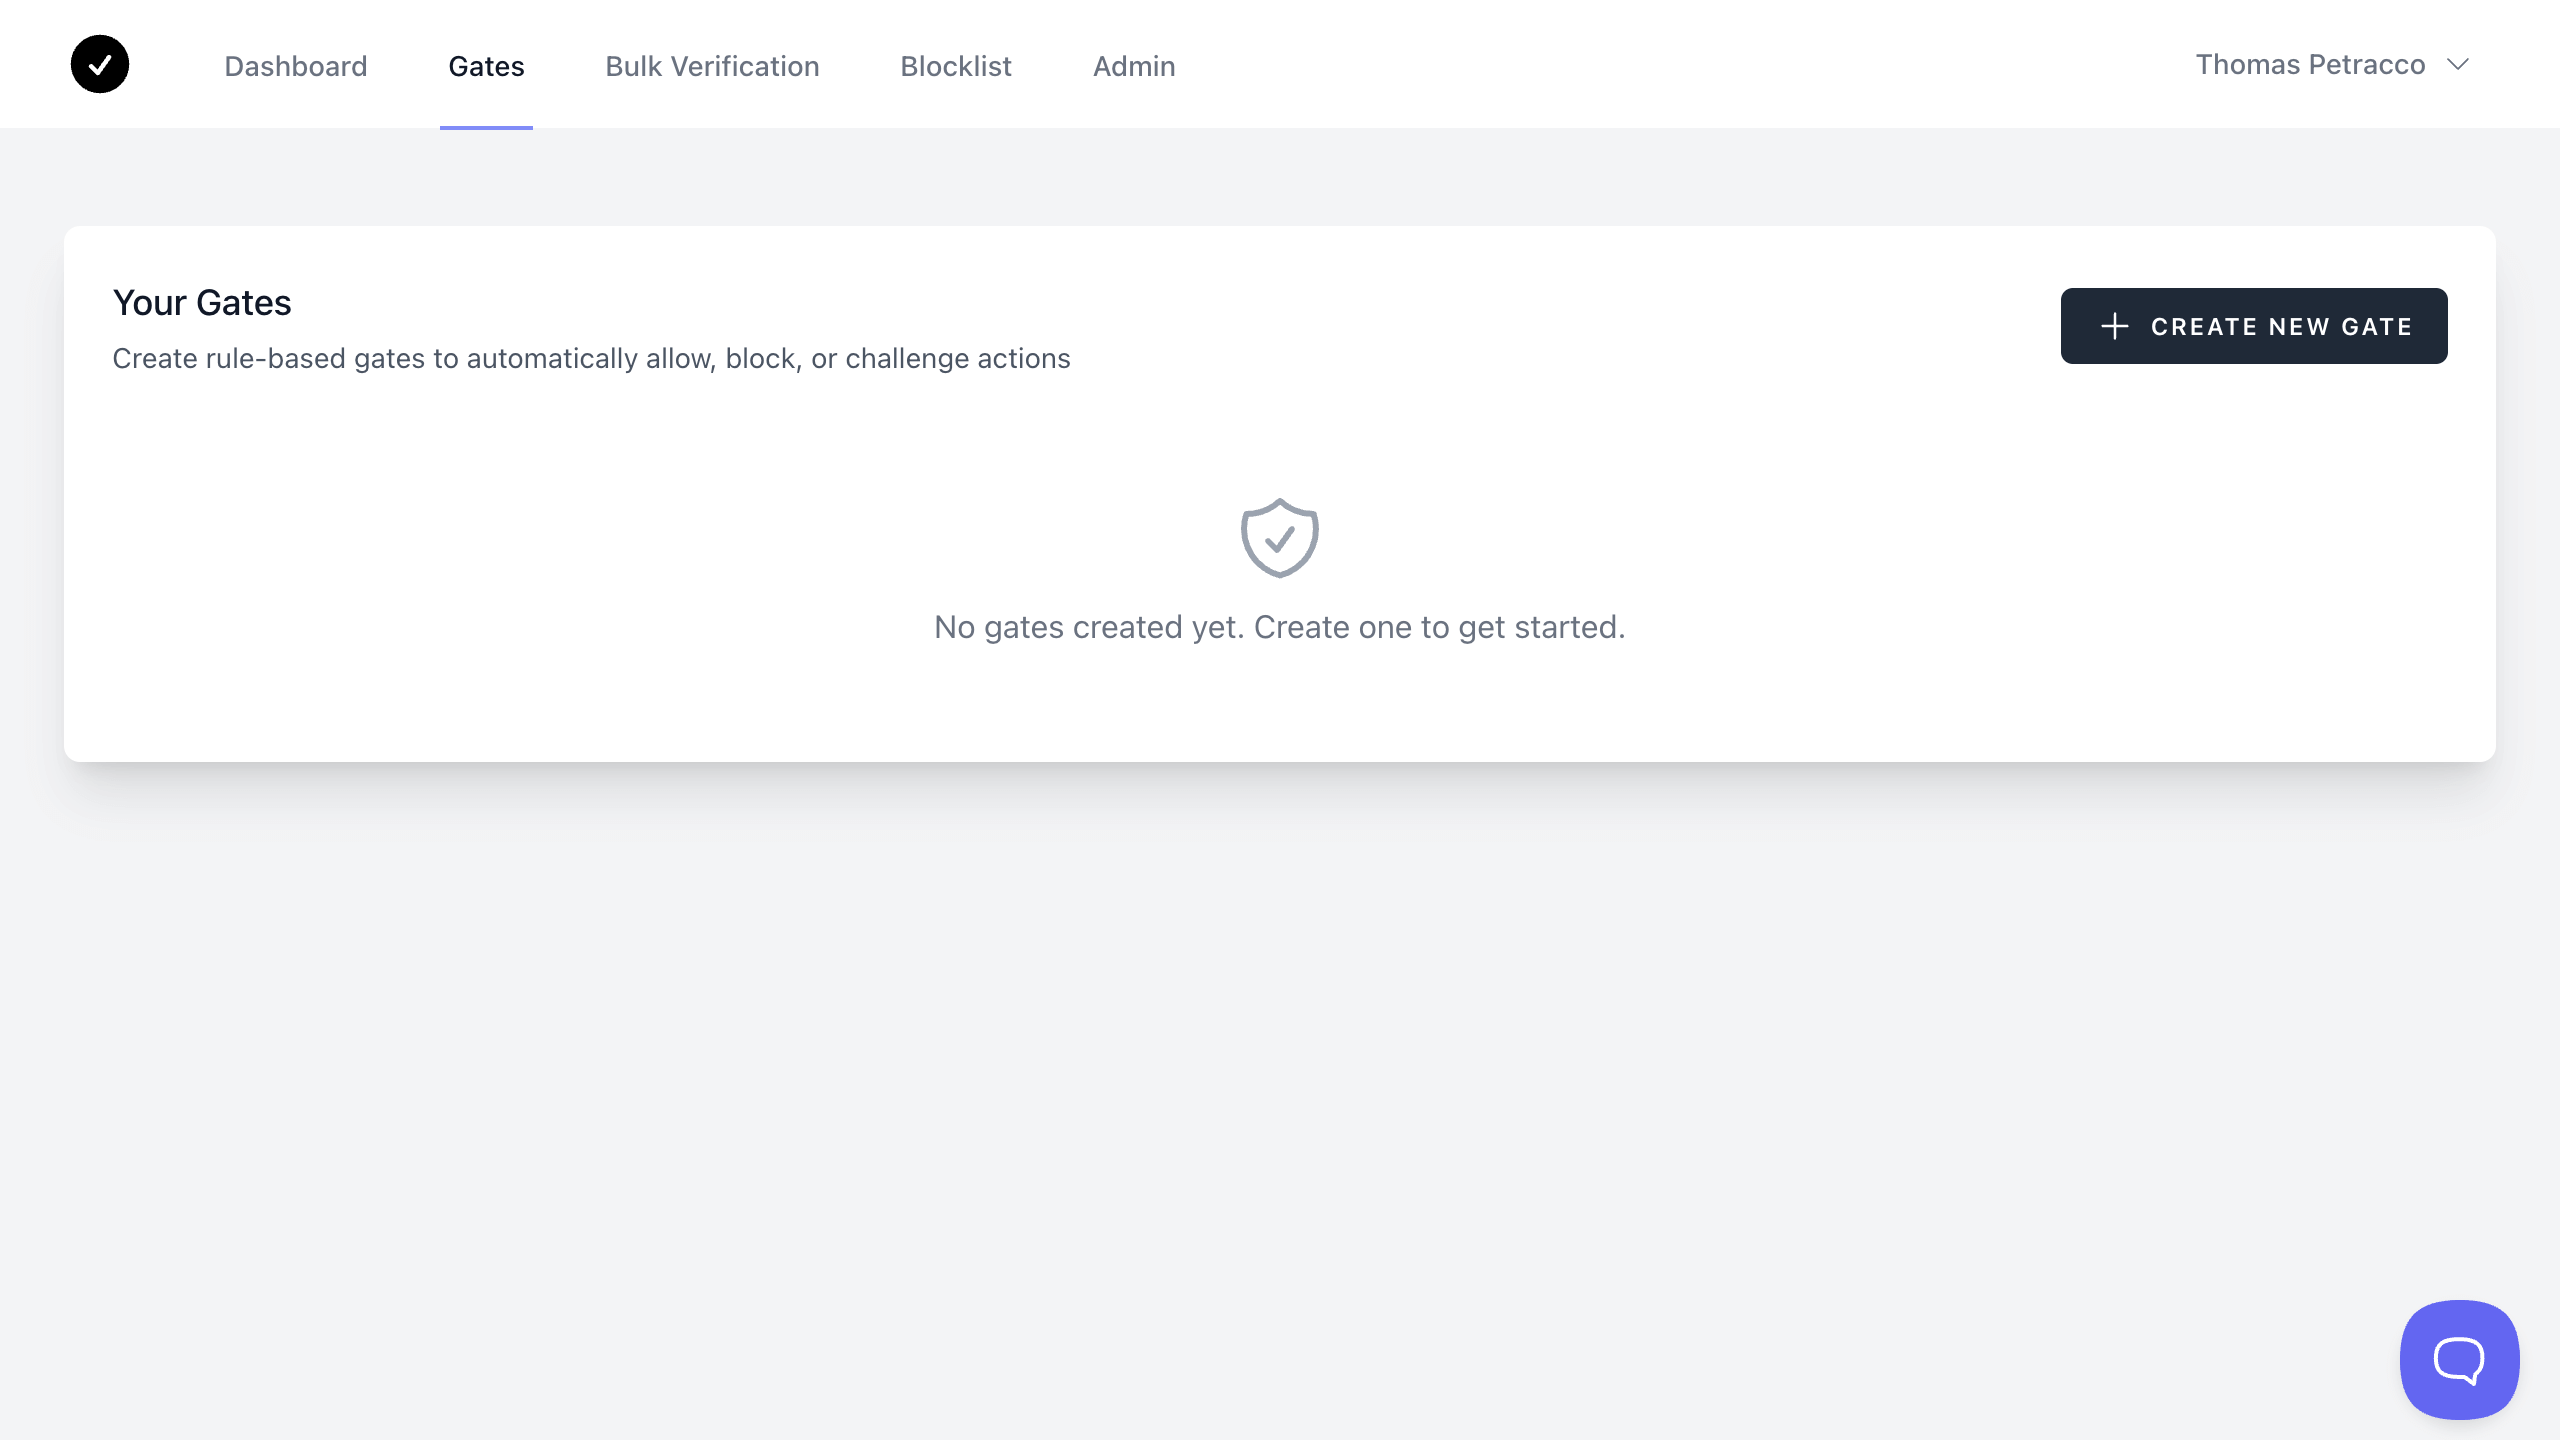
Step 1: Create Your First Gate
Navigate to the Gates section in your UserCheck dashboard. If this is your first Gate, you'll see an empty state with a "CREATE NEW GATE" button.
Click CREATE NEW GATE to open the creation form:
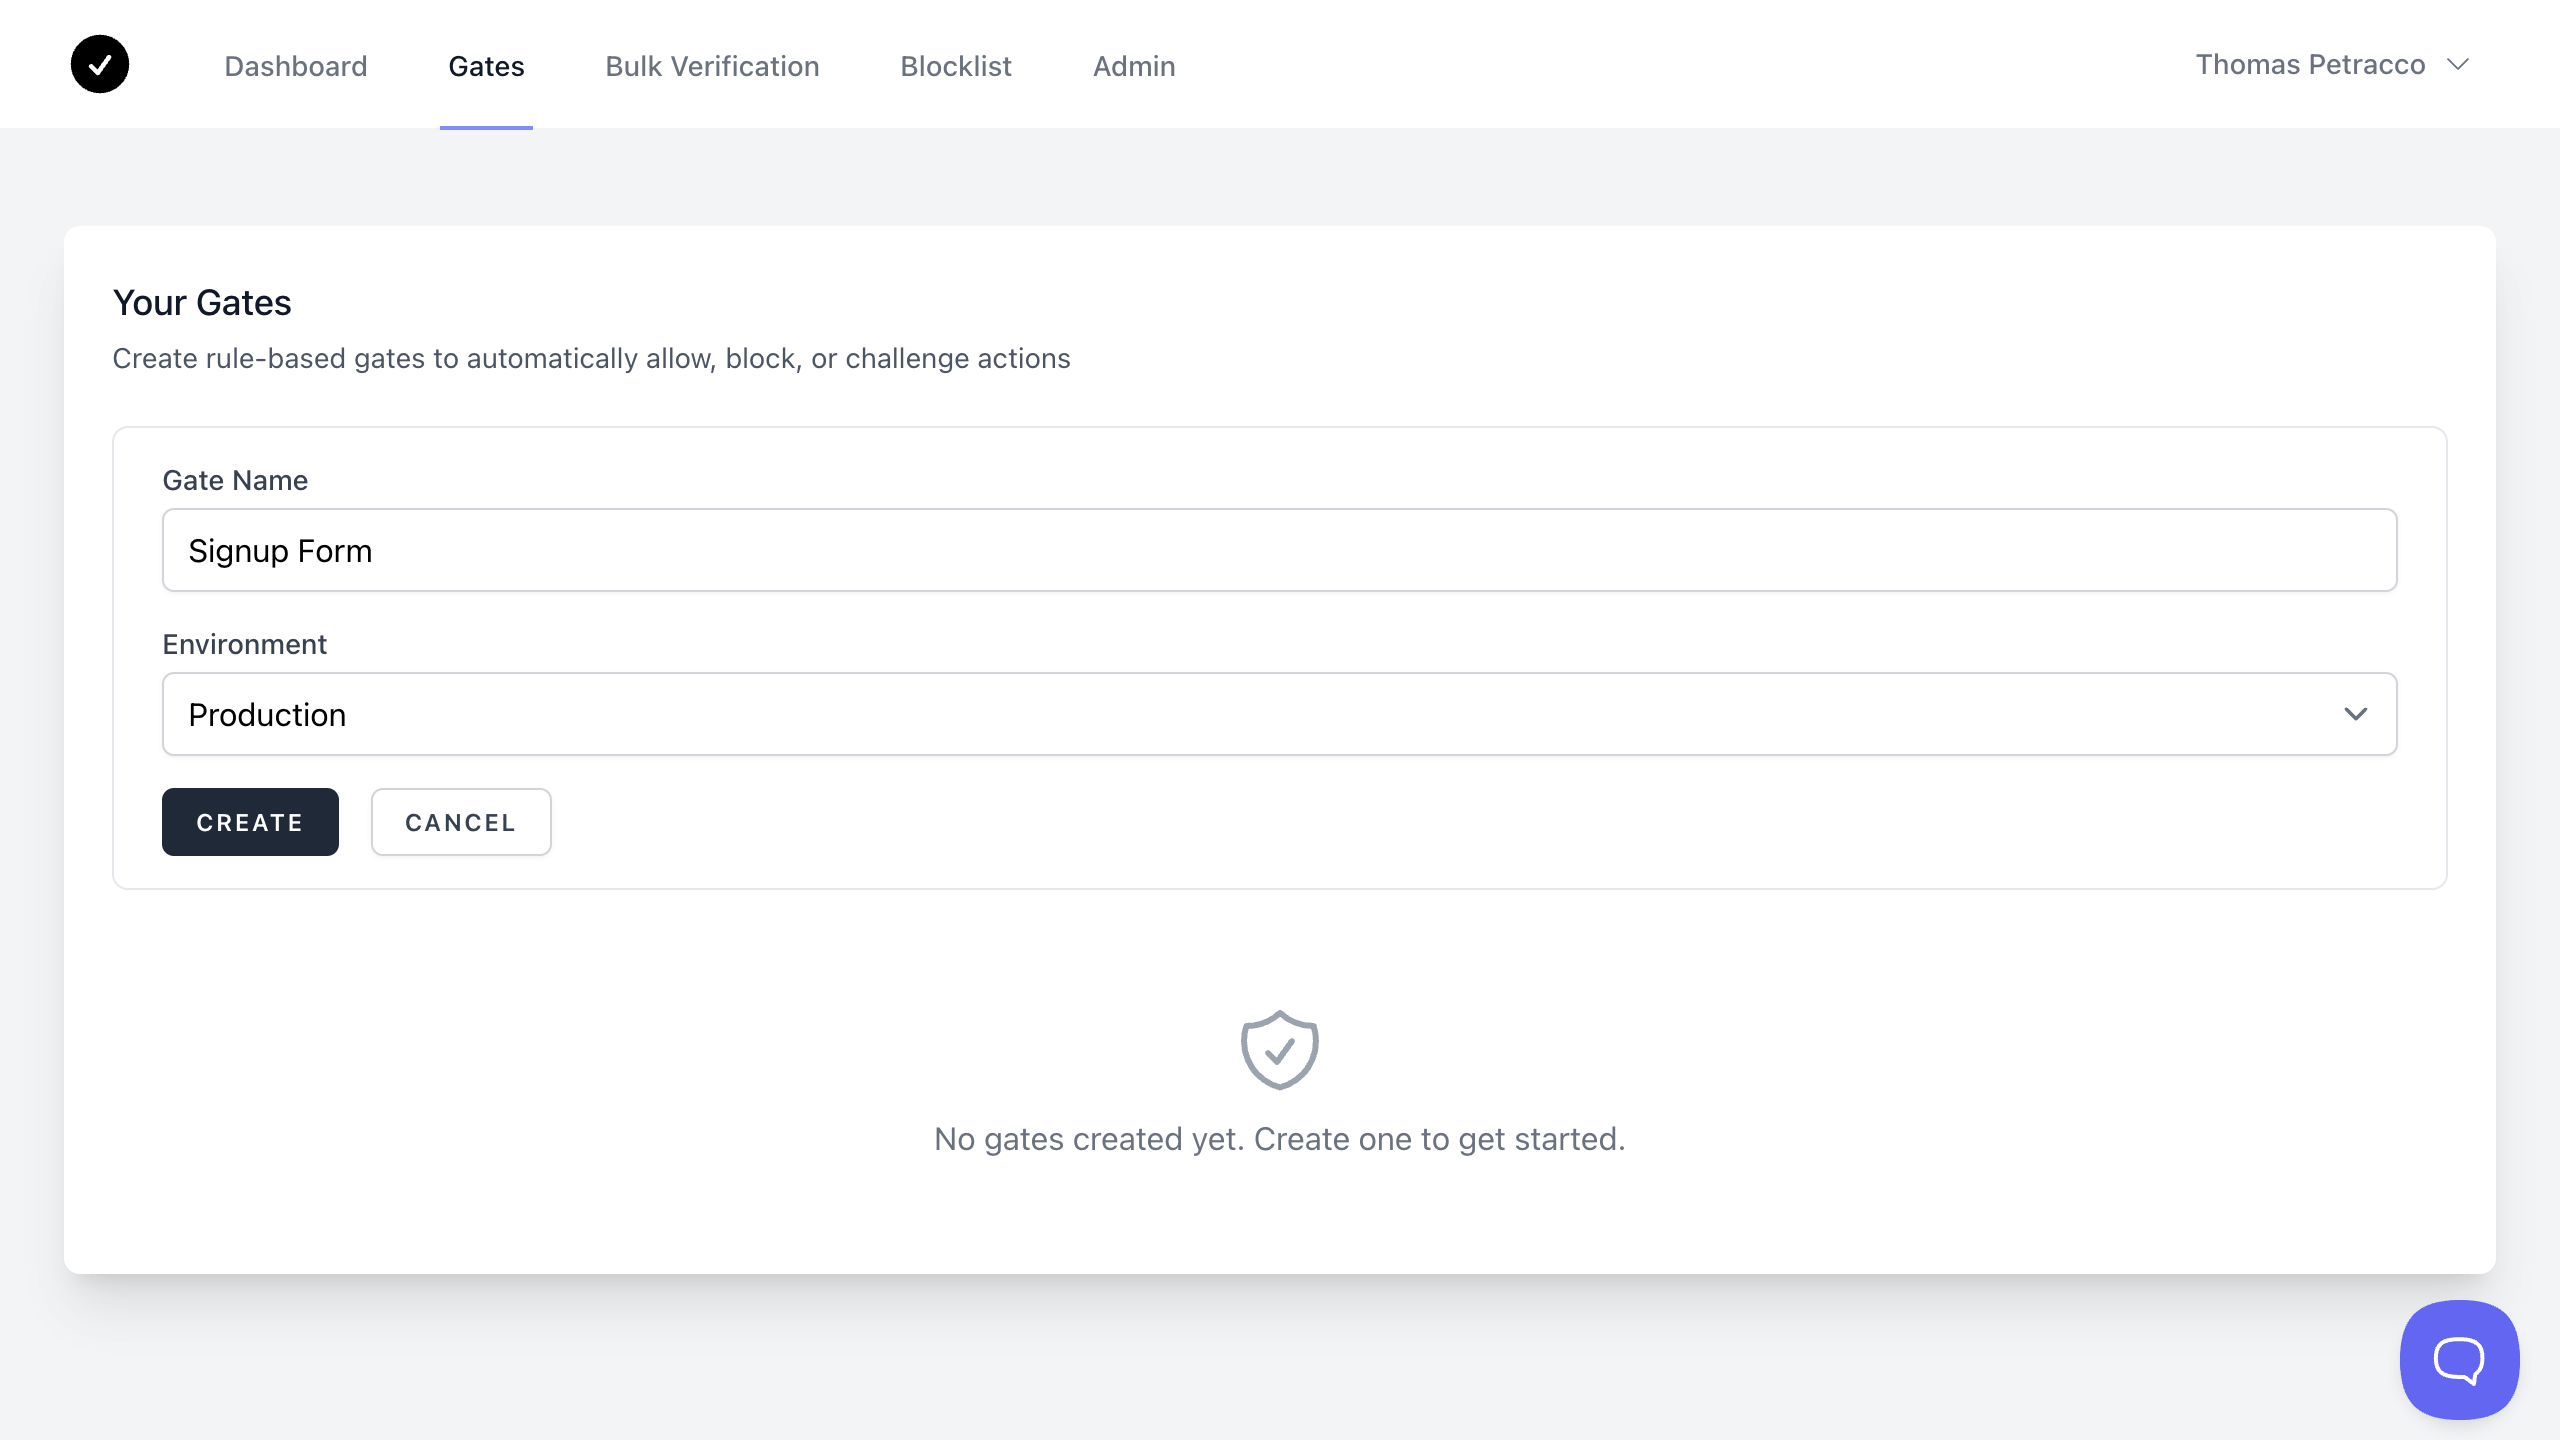
Gate Configuration
- Gate Name: Choose a descriptive name like "Signup Form", "Trial Registration", or "Comment System"
- Environment: Select Production for live traffic, or use Staging/Development for testing
Click CREATE to generate your new Gate.
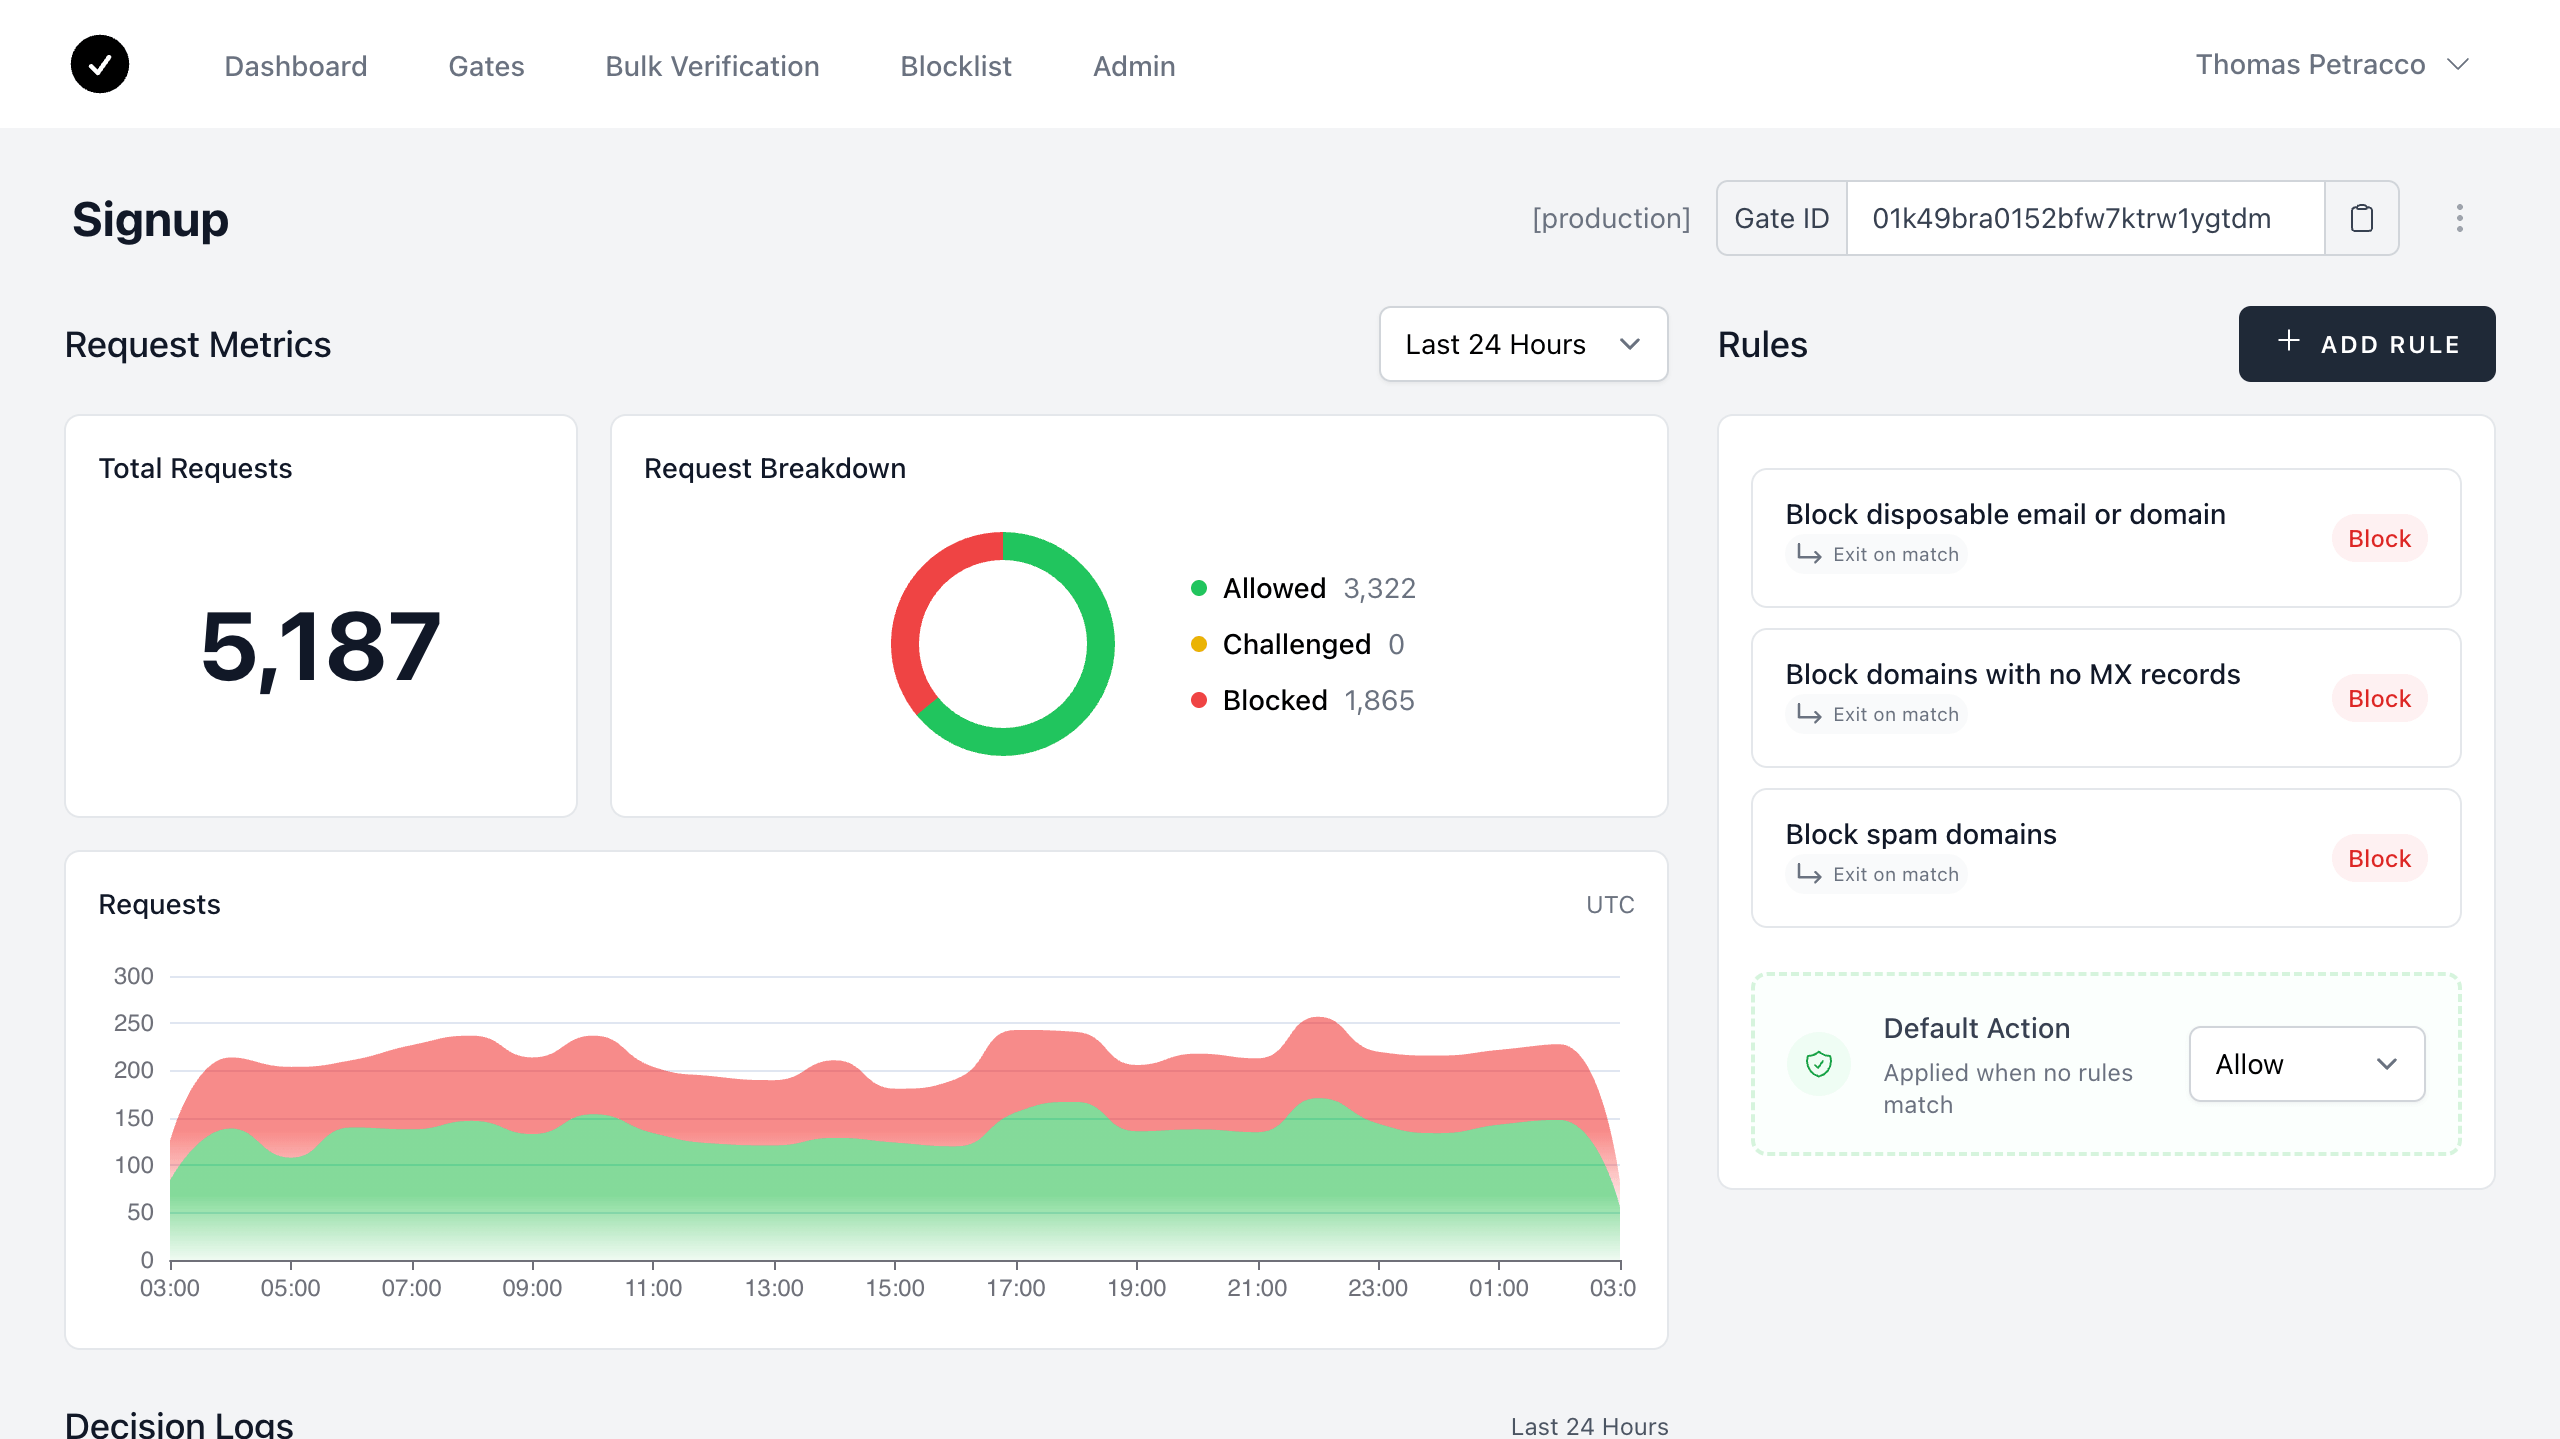
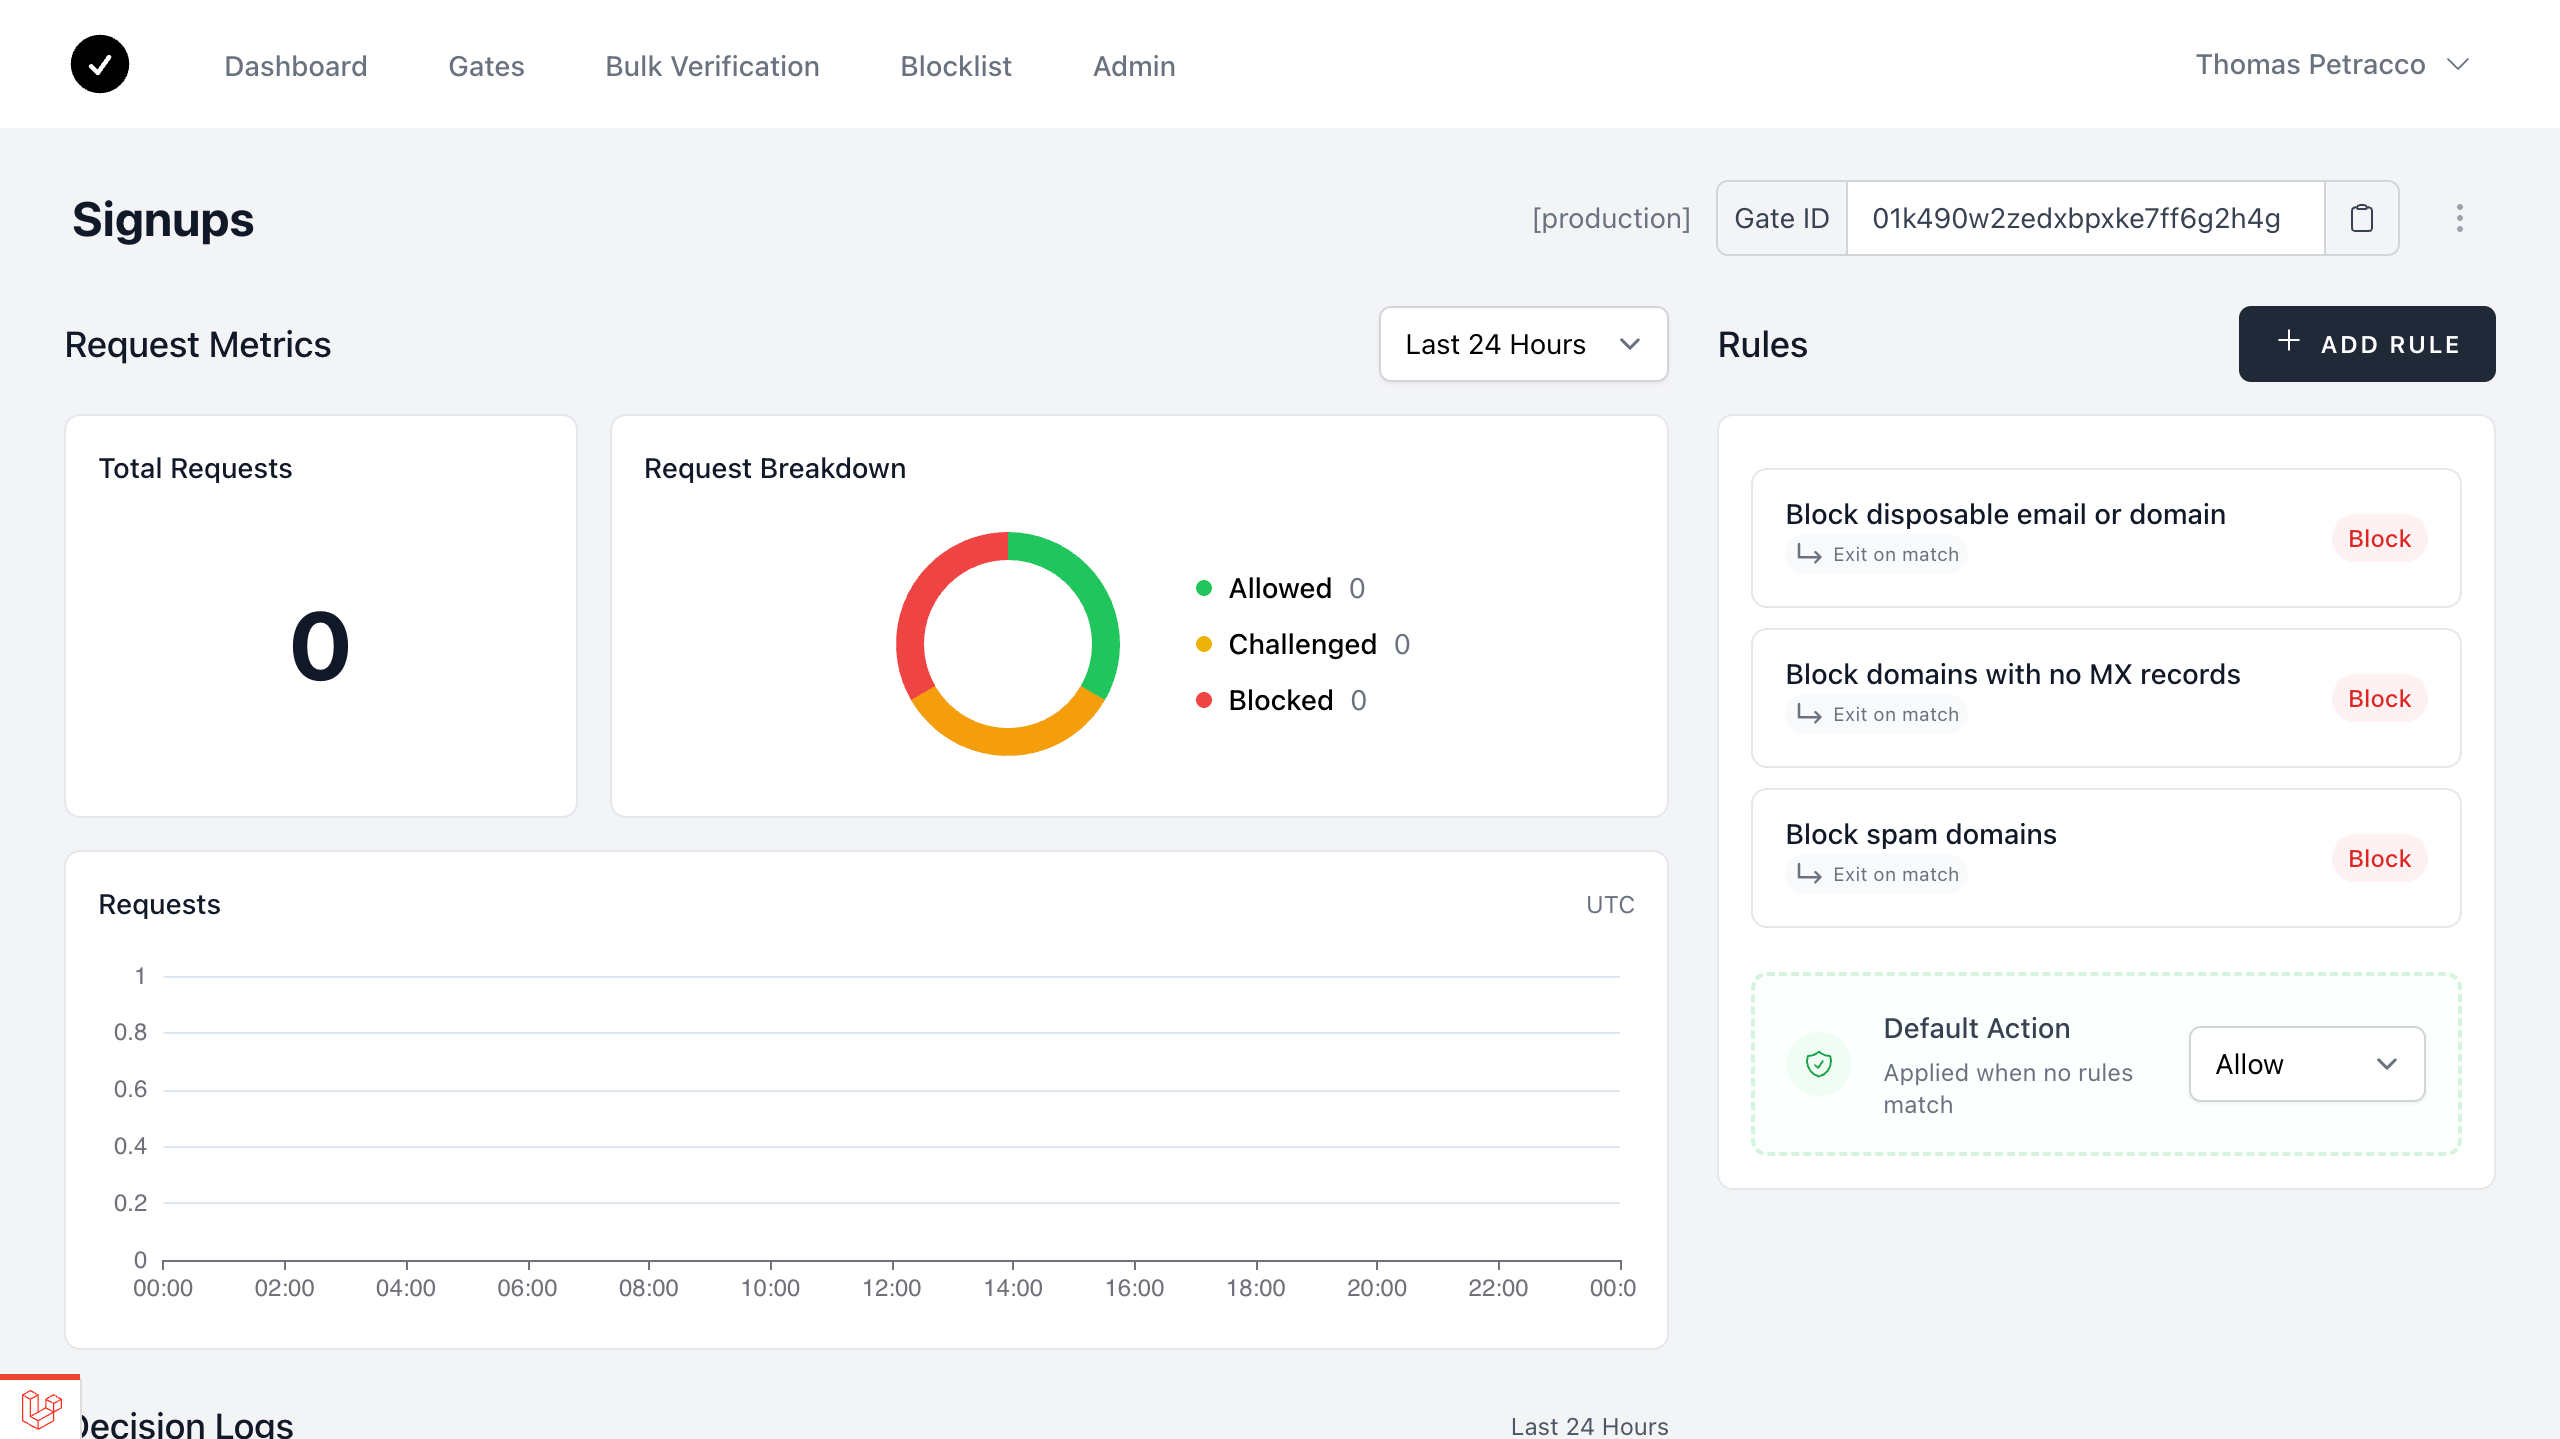
Step 2: Review Your Pre-Configured Rules
Your new Gate comes with essential protection rules already configured to get you started quickly. These cover the most common signup abuse patterns:
Customizing Your Rules
You can modify these default rules or add new ones by clicking the edit icon or ADD RULE button.
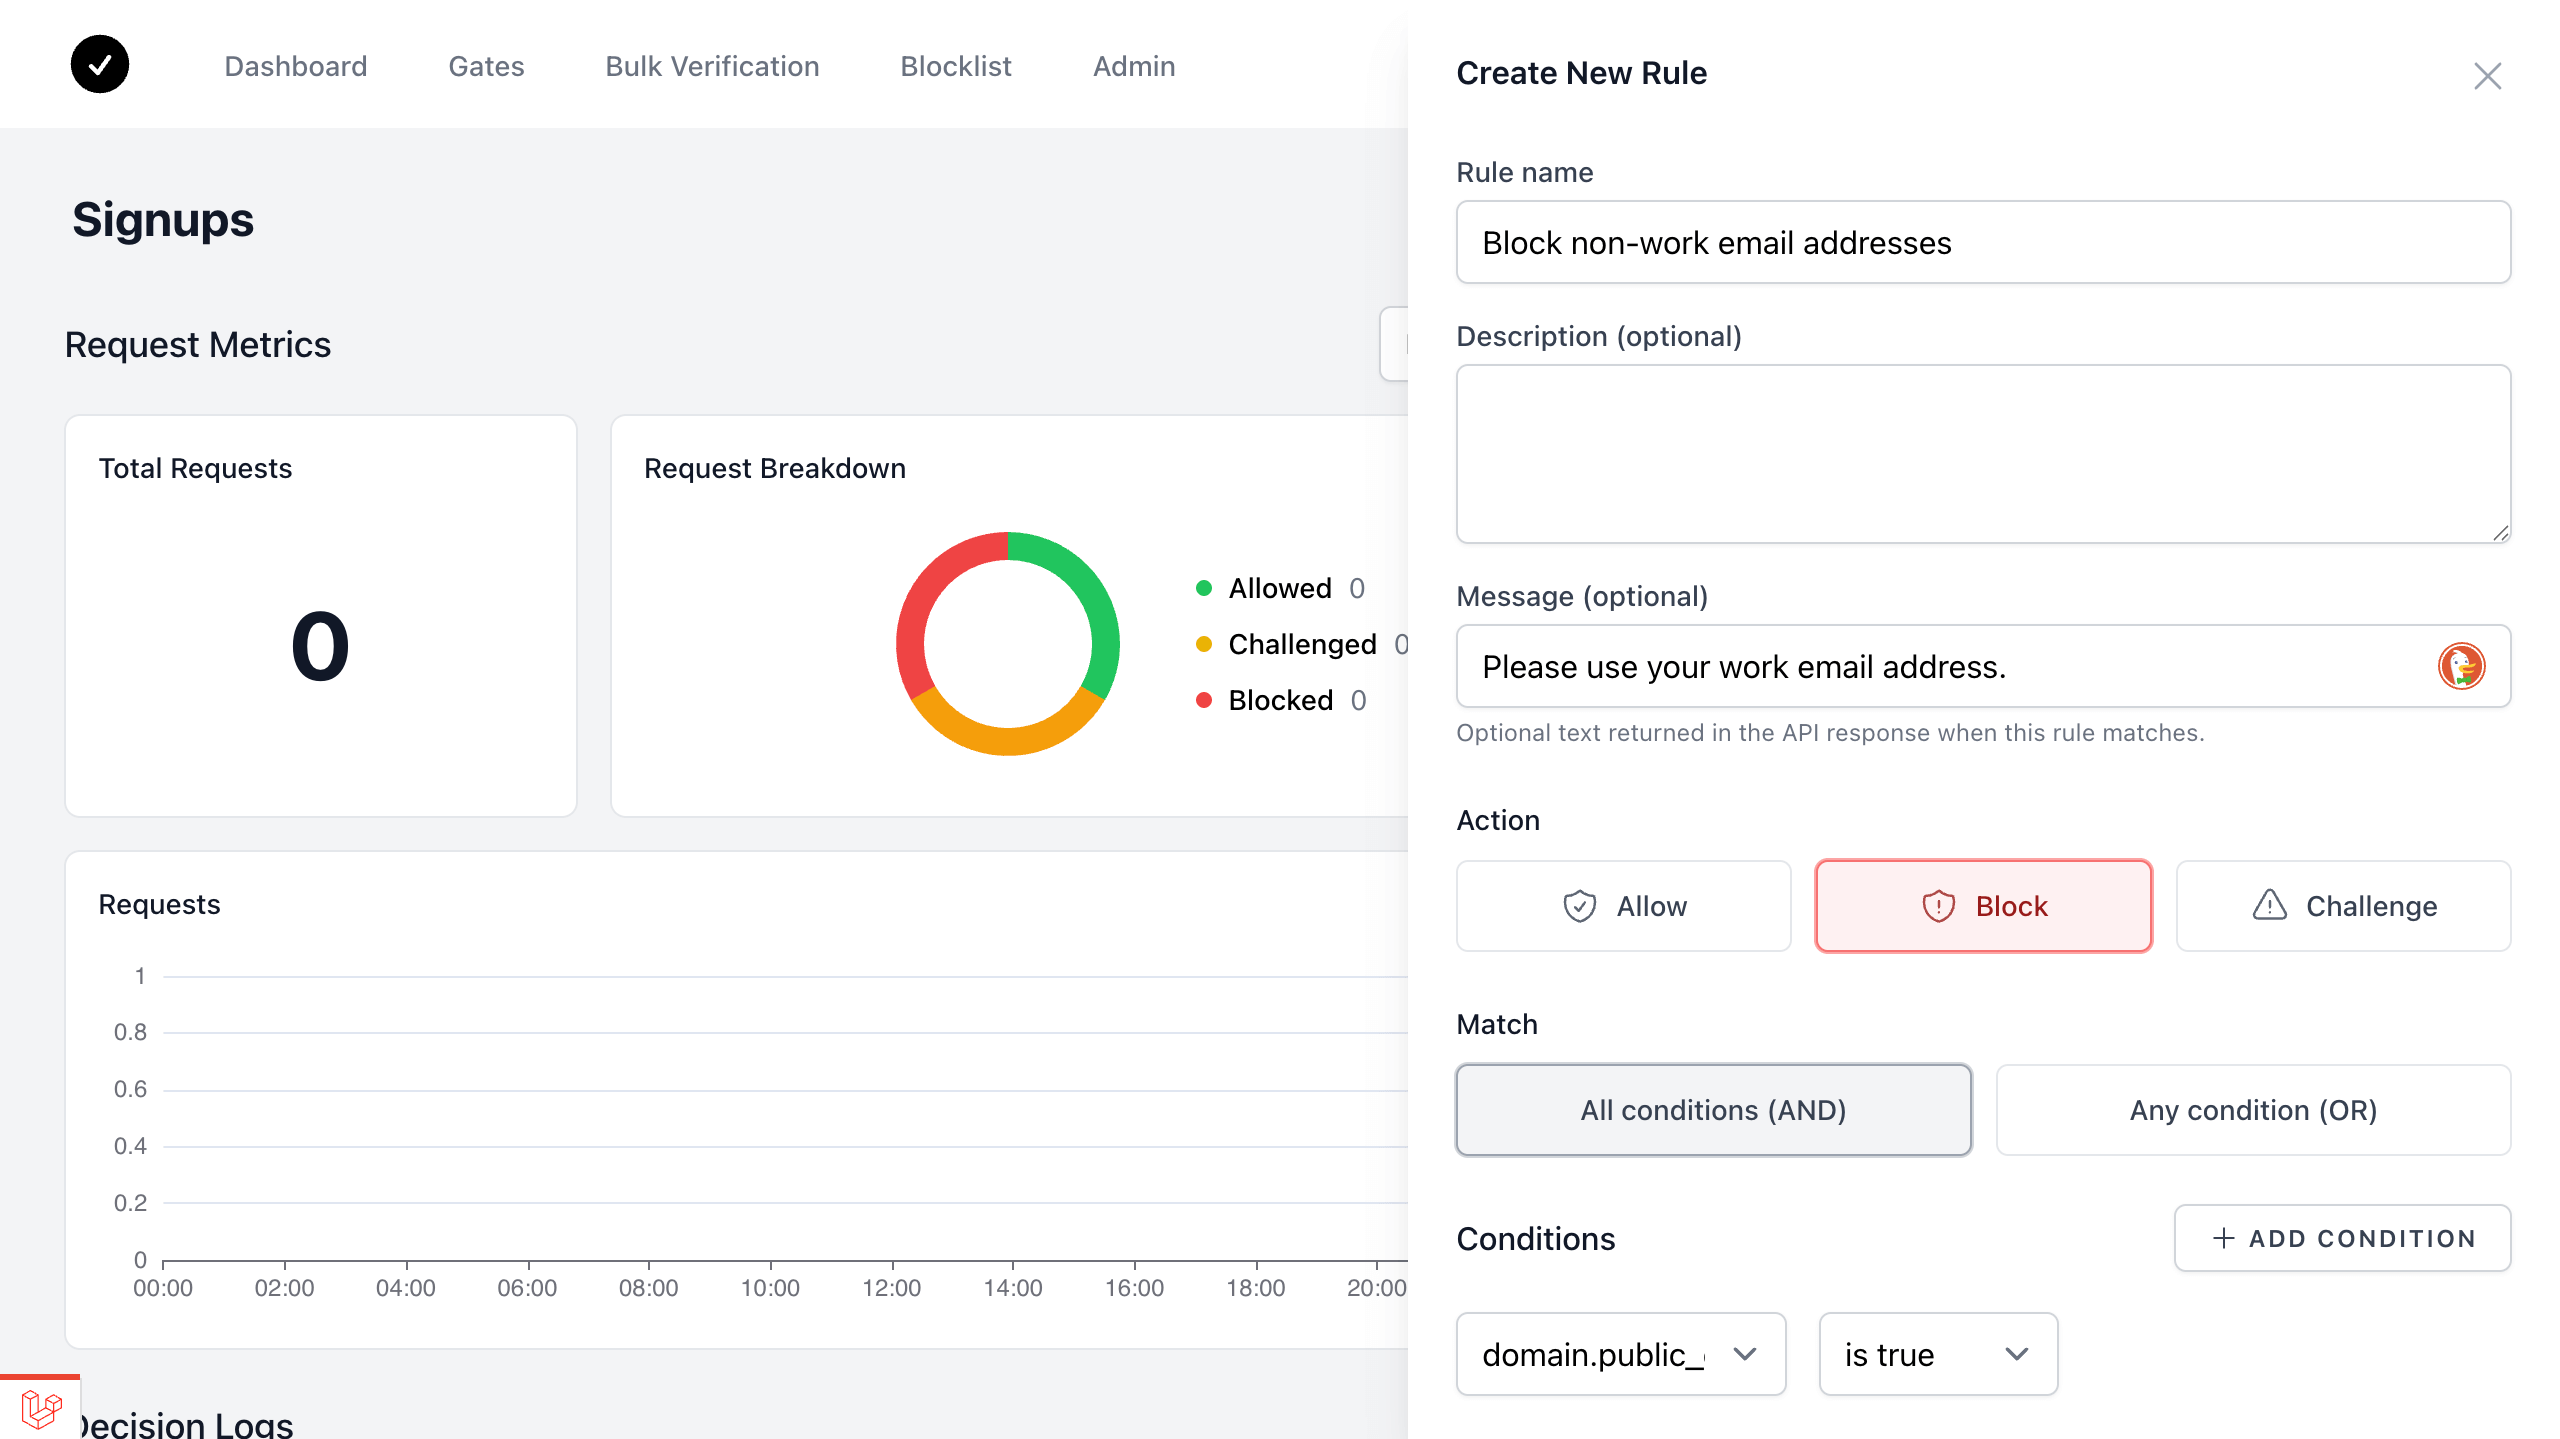
Rule Components
Each rule consists of:
- Rule Name: Descriptive label for the rule
- Description: Why this rule exists or what it targets
- Message: Message to return when the rule matches
- Action: Allow, Block, or Challenge
- Match: "All conditions (AND)" or "Any condition (OR)"
- Conditions: Field + operator + value combinations
- Message: Optional text returned when the rule matches
- Stop: Whether to skip remaining rules if this one matches
Learn more about Rules & Conditions.
Rule Ordering
Rules are evaluated top-to-bottom. Place your most restrictive rules first, followed by more nuanced logic. If a rule has "Stop" enabled and matches, evaluation stops there. You can drag and drop the rules to reorder them.
Step 3: Implement in Your Application
Send a POST request to the Decision Endpoint with the Gate ID and your API key.
curl -X POST "https://api.usercheck.com/v0/gates/{gate_id}/decisions" \
  -H "Authorization: Bearer {YOUR_API_KEY}" \
  -H "Content-Type: application/json" \
  -d '{"email": "[email protected]", "ip": "1.1.1.1"}'
The response will be a JSON object with the decision and the matched rule.
Read the Decision Endpoint documentation to learn how to call the Gate API in your application.
Step 4: Monitor Your Gate's Performance
Once your Gate is active and receiving traffic, you can monitor its effectiveness through the dashboard analytics.